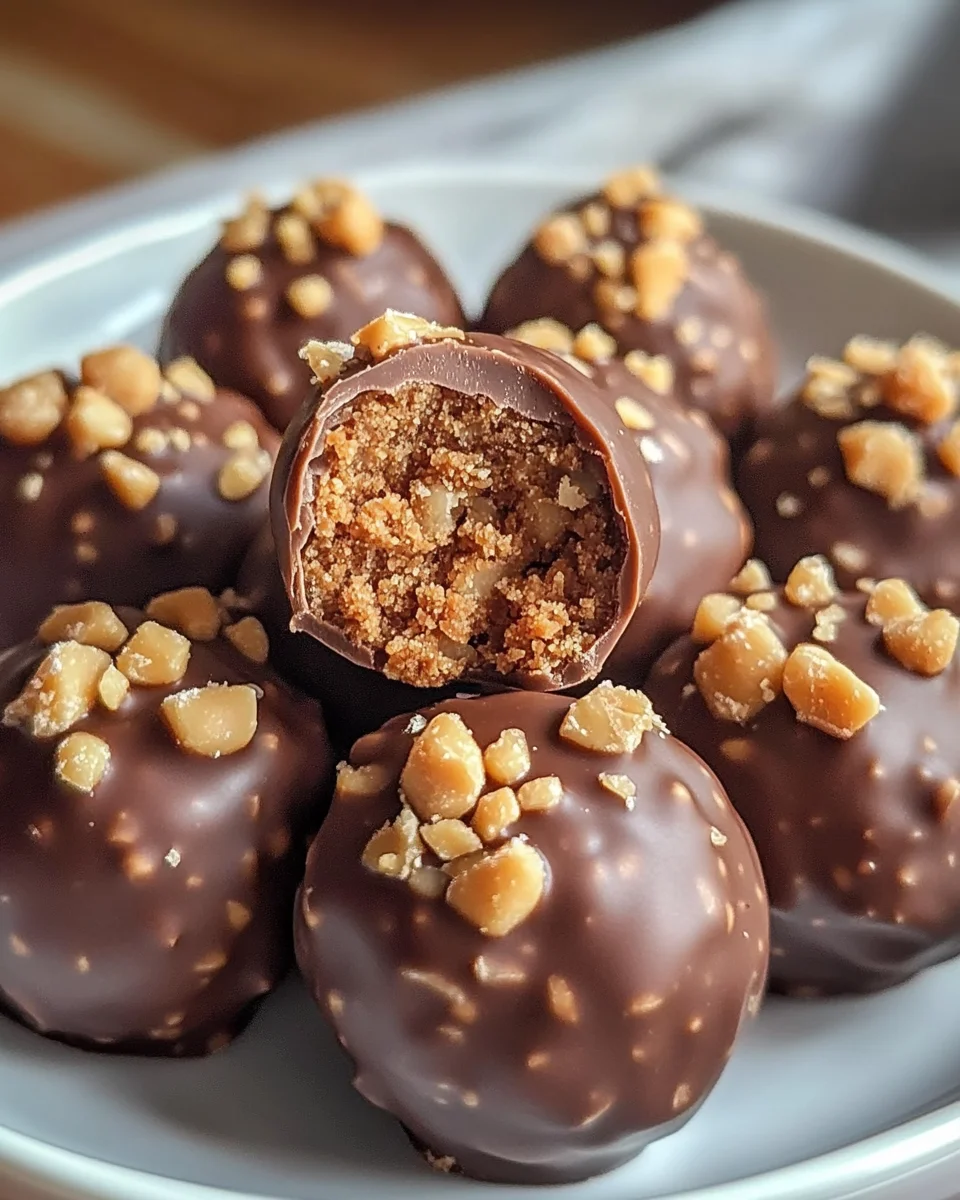
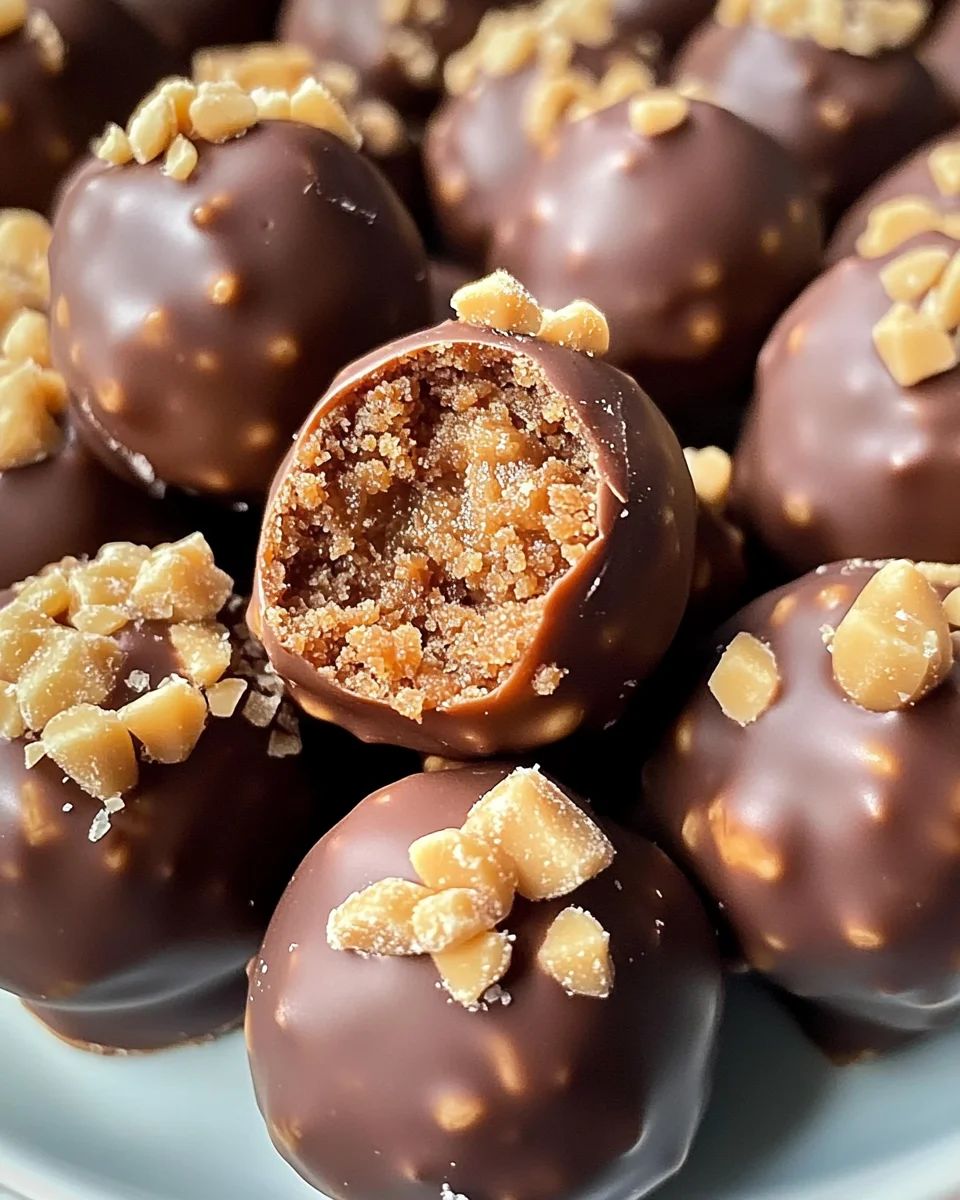
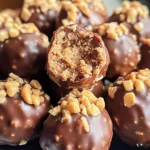
Butterfinger Balls
Indulge your taste buds with these irresistible Butterfinger Balls, where creamy peanut butter harmoniously melds with the crunch of graham crackers and Butterfinger candy bars, all cloaked in sumptuous melted chocolate. Perfect for social soirées and festive occasions, these heavenly morsels will vanish before you know it!
Why You’ll Love This Recipe
- Quick and Easy: This recipe comes together in just 15 minutes of prep time, making it perfect for a last-minute dessert.
- No Baking Required: Enjoy the sweet satisfaction of homemade treats without turning on the oven.
- Deliciously Rich Flavor: The combination of peanut butter, chocolate, and Butterfinger delivers a flavor explosion in every bite.
- Customizable Toppings: Add crushed Butterfinger bars or festive sprinkles to suit any occasion or preference.
- Perfect for Sharing: With about 20 servings, these treats are ideal for parties, gatherings, or family get-togethers.
Tools and Preparation
To create these delightful Butterfinger Balls, you’ll need some essential tools that make the process smooth and enjoyable.
Essential Tools and Equipment
- Mixing bowl
- Electric or stand mixer
- Cookie sheet
- Parchment paper
- Microwave-safe bowl
Importance of Each Tool
- Mixing bowl: A sturdy mixing bowl is essential for combining ingredients without spills.
- Electric or stand mixer: This tool saves time and effort when blending your creamy mixture to perfection.
Ingredients
Ingredients:
– 4 tablespoons softened butter (½ stick)
– 1 teaspoon vanilla extract
– 8 ounces chocolate bark or chocolate chips
– ½ cup Butterfinger bars (crushed)
– 1 cup powdered sugar
– 1 cup peanut butter (avoid all-natural varieties)
– ¾ cup crumbs from graham crackers
– Optional garnishes: additional crushed Butterfinger bars (festive sprinkles, or coarse sea salt)
How to Make Butterfinger Balls
Step 1: Prepare the Dough
In a mixing bowl, combine peanut butter and softened butter. Use an electric or stand mixer set to medium speed and blend until the mixture is creamy and uniform.
Step 2: Add Aromatic Notes
Incorporate vanilla extract into the mixture and blend thoroughly until fully combined.
Step 3: Sweeten the Deal
Gradually add powdered sugar, blending at low speed. Be sure to scrape down the sides of the bowl as necessary for even mixing.
Step 4: Crunch Time
Gently fold in graham cracker crumbs and crushed Butterfinger bars, ensuring they are evenly distributed throughout the dough.
Step 5: Shape ’em Up
Line a large cookie sheet with parchment paper. Scoop out approximately 1 to 1½ tablespoons of dough, roll into neat balls, and place them on the cookie sheet.
Step 6: Chilling Phase
Freeze the dough balls on the sheet for about 30 minutes until they are completely firm.
Step 7: Melting the Chocolate
Once chilled, melt your chocolate bark or chocolate chips. Use a microwave-safe bowl and heat in 30-second spurts at 50% power, stirring in between each interval. Be careful not to overheat; some lumps should remain as they will melt while stirring.
Step 8: Coat and Decorate
Submerge each chilled ball into the luscious melted chocolate. You can choose to fully coat them or leave a bit of the peanut butter mixture exposed for visual appeal.
Step 9: Finishing Touches
Sprinkle additional crushed Butterfinger bars, holiday-themed sprinkles, or a dash of flaky sea salt on top for an extra pop of flavor.
Step 10: The Grand Finale
Allow the chocolate to solidify fully before indulging in your delicious Butterfinger Balls. Enjoy!
How to Serve Butterfinger Balls
These delightful Butterfinger Balls are perfect for any occasion. Whether you’re hosting a party or looking for a sweet treat to share, these bites of bliss can be served in various ways to enhance your experience.
Party Platter
- Arrange your Butterfinger Balls on a decorative platter for an eye-catching centerpiece. Add some fresh fruit or nuts around the balls for color and texture.
Gift Packaging
- Wrap individual Butterfinger Balls in clear plastic wrap and tie them with festive ribbons. They make a charming homemade gift for friends and family during holidays or special occasions.
Dessert Bar
- Create a dessert bar featuring your Butterfinger Balls alongside other treats like brownies, cookies, and fruit tarts. This setup allows guests to mix and match their favorite sweets.
Movie Night Treats
- Serve Butterfinger Balls in fun paper cups for a cozy movie night snack. Pair them with popcorn and other finger foods for a complete experience.
Holiday Gatherings
- Place your Butterfinger Balls on the dessert table during holiday gatherings. Their combination of flavors will surely delight everyone at the celebration.
Kid-Friendly Snacks
- Cut the Butterfinger Balls into smaller pieces for kids’ parties. They can enjoy these treats without feeling overwhelmed by size.
How to Perfect Butterfinger Balls
Perfecting your Butterfinger Balls can make all the difference in taste and presentation. Here are some tips to ensure they turn out amazing every time.
-
Use Room Temperature Ingredients: Ensure your butter and peanut butter are at room temperature. This helps create a smooth mixture that is easy to work with.
-
Don’t Overmix: When adding the graham cracker crumbs and crushed Butterfinger bars, mix gently. Overmixing can lead to a dense texture.
-
Experiment with Chocolate Coating: Try different types of chocolate, such as dark, milk, or white chocolate, to find your favorite flavor combination.
-
Chill Thoroughly: Make sure to freeze the balls long enough before coating them in chocolate. This prevents them from falling apart when dipped.
-
Add Personal Touches: Customize your Butterfinger Balls with toppings like chopped nuts or drizzles of caramel for added flavor and visual appeal.
Best Side Dishes for Butterfinger Balls
While Butterfinger Balls are a sweet treat on their own, pairing them with the right side dishes can create a well-rounded experience. Here are some great options:
-
Vanilla Ice Cream: A classic pairing that complements the rich flavors of the Butterfinger Balls perfectly.
-
Fruit Salad: A fresh mix of seasonal fruits adds brightness and balances out the sweetness of the dessert.
-
Chocolate Fondue: For an interactive dessert experience, serve melted chocolate fondue alongside fruit and pretzels for dipping.
-
Cheese Platter: Combining sweet with savory, offer a selection of cheeses that can contrast nicely against the sweetness of the balls.
-
Milkshakes: Creamy milkshakes made with vanilla or chocolate ice cream provide a deliciously indulgent drink option alongside your treats.
-
Coffee or Espresso: Serving strong coffee or espresso brings out the flavors of the peanut butter while providing a comforting beverage option.
-
Nut Mix: A selection of spiced or candied nuts offers crunchiness that pairs well with the creamy texture of Butterfinger Balls.
-
Graham Crackers: Simple yet effective, graham crackers can enhance the graham flavor in your dessert while adding an enjoyable crunch.
Common Mistakes to Avoid
Making Butterfinger Balls can be fun, but avoiding common mistakes will ensure you achieve the best results.
- Overmixing the Dough: Mixing too much can result in a dense texture. Blend just until the ingredients are combined for a light and fluffy treat.
- Not Chilling the Dough: Skipping the chilling step may cause the balls to lose shape when coated with chocolate. Always freeze for at least 30 minutes to maintain structure.
- Using All-Natural Peanut Butter: All-natural varieties can alter the consistency of your mixture. Stick to regular peanut butter for the best outcome.
- Ignoring Chocolate Melting Tips: Overheating chocolate can lead to a burnt taste and unusable texture. Melt slowly in short bursts and stir frequently to avoid this.
- Forgetting Optional Garnishes: Skipping garnishes may make your Butterfinger Balls less appealing. Adding crushed Butterfinger bars or festive sprinkles enhances both visual appeal and flavor.
Storage & Reheating Instructions
Refrigerator Storage
- Store in an airtight container for up to one week.
- Keep in a cool, dry place away from sunlight.
Freezing Butterfinger Balls
- Freeze in a single layer on a baking sheet before transferring to an airtight container.
- They can last up to three months in the freezer.
Reheating Butterfinger Balls
- Oven: Preheat to 350°F (175°C) and bake for 5-10 minutes until warmed through.
- Microwave: Heat each ball for about 10-15 seconds on medium power.
- Stovetop: Place in a skillet over low heat, turning occasionally until warmed.
Frequently Asked Questions
Here are some common questions about making Butterfinger Balls that might help you out.
How do I make my Butterfinger Balls more chocolatey?
You can dip your Butterfinger Balls twice in melted chocolate for an extra rich coating. This adds more chocolate flavor and makes them even more indulgent.
Can I use different types of candy bars?
Absolutely! Feel free to substitute with your favorite candy bars like Snickers or Reese’s for different flavor profiles while maintaining the overall recipe structure.
Are Butterfinger Balls gluten-free?
If you use gluten-free graham cracker crumbs, then yes! Just check labels carefully to ensure all ingredients meet gluten-free standards.
How long do Butterfinger Balls last?
When stored properly, they can last up to one week in the refrigerator or three months in the freezer, making them perfect for meal prepping!
Final Thoughts
These Butterfinger Bliss Balls are not only delicious but also versatile. You can customize them with various toppings or fillings based on your preferences. Try this delightful recipe today and add a sweet touch to any occasion!
Butterfinger Balls
Indulge in the delightful world of Butterfinger Balls, a no-bake treat that combines creamy peanut butter, crunchy graham crackers, and irresistible Butterfinger candy bars, all enveloped in rich melted chocolate. These sweet bites are perfect for any occasion, from casual get-togethers to festive celebrations. With just 15 minutes of prep time and no baking required, you can create a delectable dessert that will disappear before your eyes. Customize them with fun toppings like crushed Butterfinger or colorful sprinkles for an extra touch of whimsy. Share these heavenly morsels at your next party, and watch as everyone falls in love with their creamy texture and rich flavor!
- Prep Time: 15 minutes
- Cook Time: None
- Total Time: 0 hours
- Yield: Approximately 20 servings 1x
- Category: Dessert
- Method: No-Bake
- Cuisine: American
Ingredients
- 4 tablespoons softened butter
- 1 cup peanut butter
- 1 cup powdered sugar
- ¾ cup graham cracker crumbs
- ½ cup crushed Butterfinger bars
- 8 ounces chocolate bark or chocolate chips
- Optional: additional toppings (more crushed Butterfinger, sprinkles, sea salt)
Instructions
- In a mixing bowl, blend softened butter and peanut butter until creamy.
- Add vanilla extract and mix well.
- Gradually incorporate powdered sugar while mixing at low speed.
- Fold in graham cracker crumbs and crushed Butterfinger until evenly combined.
- Shape into balls about 1 to 1½ tablespoons each and place on a parchment-lined cookie sheet.
- Freeze for 30 minutes until firm.
- Melt chocolate in a microwave-safe bowl at 50% power in short intervals until smooth.
- Dip each ball into melted chocolate, coating thoroughly or partially as desired.
- Sprinkle with additional toppings before the chocolate sets.
- Allow to cool completely before serving.
Nutrition
- Serving Size: 1 serving
- Calories: 138
- Sugar: 9g
- Sodium: 77mg
- Fat: 8g
- Saturated Fat: 3g
- Unsaturated Fat: 5g
- Trans Fat: 0g
- Carbohydrates: 15g
- Fiber: 0g
- Protein: 3g
- Cholesterol: 5mg