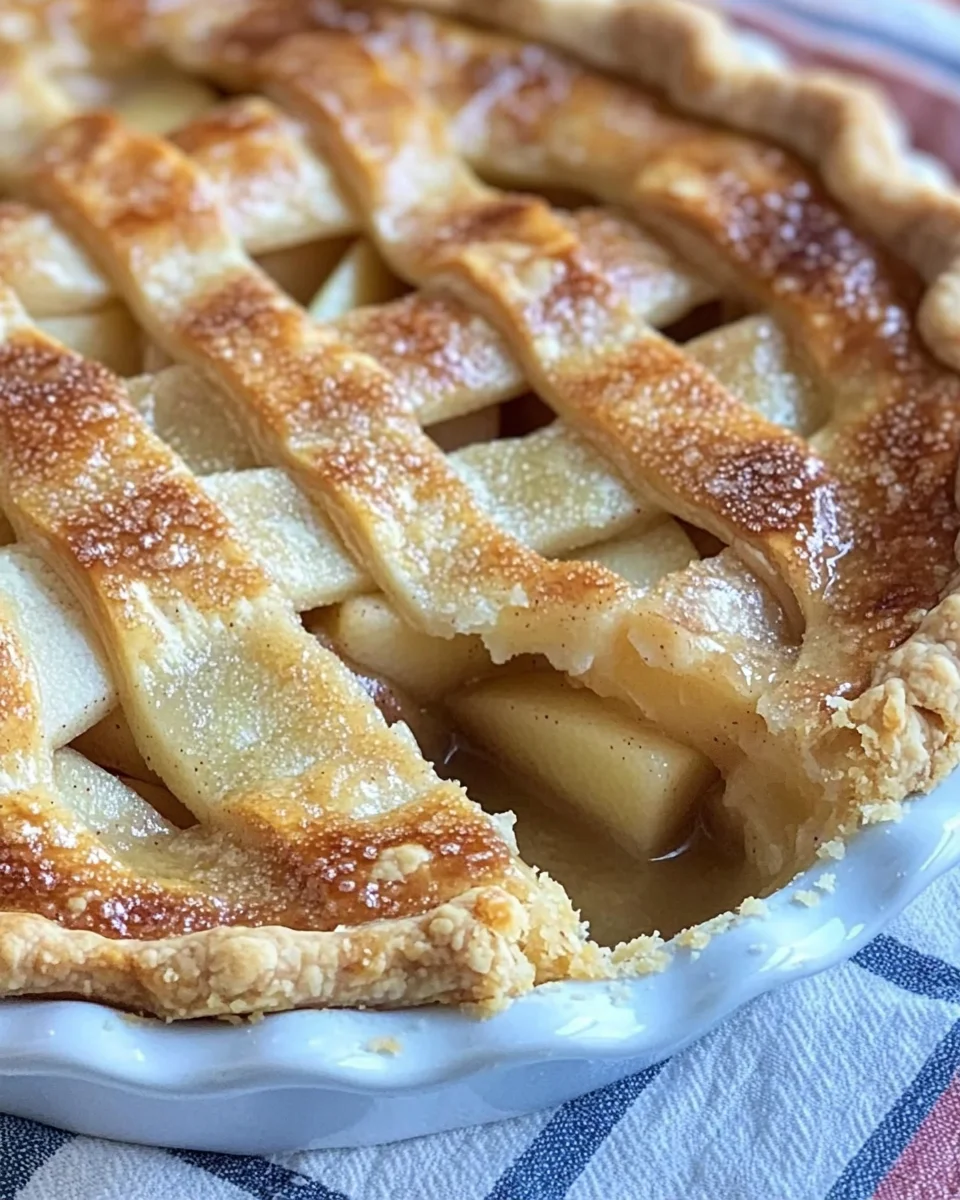
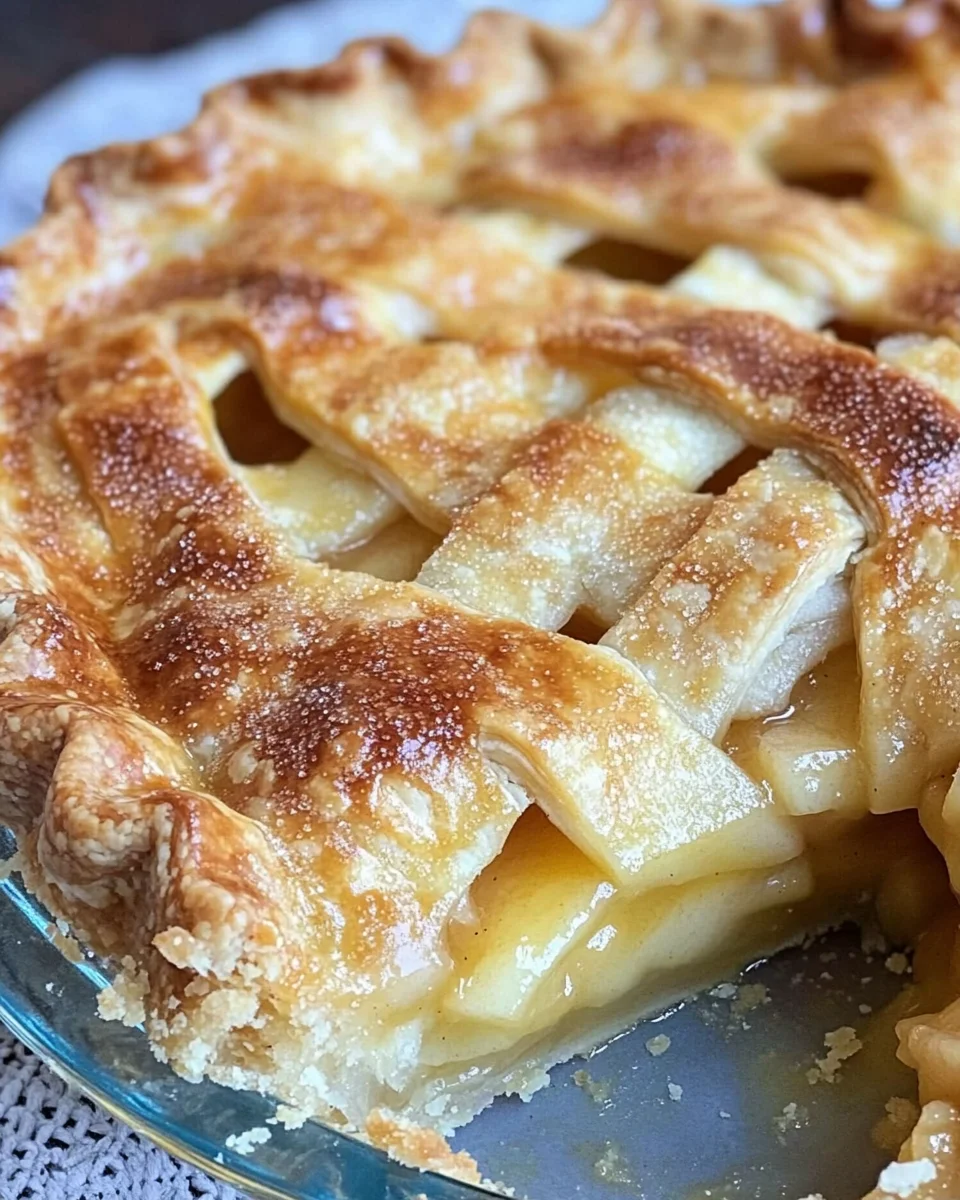
Blue Ribbon Apple Pie
The Blue Ribbon Apple Pie is a timeless classic that brings comfort and joy to any gathering. With its perfect balance of tart and sweet flavors, this pie is sure to impress at family dinners, holiday feasts, or casual get-togethers. The flaky crust combined with tender apple filling creates a delightful experience in every bite. Whether served warm with ice cream or at room temperature, this pie is a must-try for anyone who loves baked goods.
Why You’ll Love This Recipe
- Deliciously Balanced Flavors: The combination of tart Granny Smith apples and sweet Honeycrisp apples creates a delectable flavor profile.
- Perfect for Any Occasion: From Thanksgiving to a simple weeknight dessert, this pie fits all events beautifully.
- Homemade Goodness: Using fresh ingredients ensures your pie is flavorful and wholesome.
- Easy to Follow: Each step of the recipe is straightforward, making it accessible for bakers of all skill levels.
- Impressive Presentation: The golden crust and bubbling apple filling make for an eye-catching dessert.
Tools and Preparation
Before you start baking your Blue Ribbon Apple Pie, gather the necessary tools to ensure a smooth process. Having the right tools will make preparing your pie easier and more enjoyable.
Essential Tools and Equipment
- 9-inch pie plate
- Rolling pin
- Large pot or Dutch oven
- Colander
- Rimmed baking sheet
- Sharp paring knife
- Pastry brush
Importance of Each Tool
- 9-inch pie plate: This size is ideal for achieving the perfect pie shape and ensuring even cooking.
- Rolling pin: Essential for rolling out the dough to the correct thickness without tearing.
- Colander: Helps drain excess juice from the cooked apples, preventing a soggy crust.
Ingredients
Ingredients:
– 1 recipe double-crust pie dough (see note)
– 2 1/2 pounds about 5 firm tart apples, peeled, cored, and sliced 1/4-inch thick (I use Granny Smith)
– 2 1/2 pounds about 5 firm, sweet apples, peeled, cored and sliced 1/4-inch thick (I use Honeycrisp)
– 1/2 cup plus 1 tablespoon granulated sugar
– 1/4 cup packed light brown sugar
– 1/2 teaspoon grated fresh lemon zest
– 1/4 teaspoon salt
– 1/8 teaspoon ground cinnamon
– 2 teaspoons fresh lemon juice
– 1 egg white (beaten lightly)
How to Make Blue Ribbon Apple Pie
Step 1: Roll Out the Dough
Roll out one half of the pie dough and place it in a 9-inch pie plate. Trim the crust to fit the edge of the plate. Refrigerate until you’re ready to use it.
Step 2: Prepare the Apples
Toss the apples with 1/2 cup of granulated sugar, brown sugar, lemon zest, salt, and cinnamon in a large pot or Dutch oven. Cook over medium heat while stirring frequently until the apples are tender but not mushy—about 10-12 minutes. Avoid overcooking as they will soften further in the oven.
Step 3: Cool the Apples
Transfer the cooked apples along with their juice onto a rimmed baking sheet in an even layer. Allow them to cool to room temperature for about 30 minutes.
Step 4: Preheat Oven and Prepare Juice Mixture
Preheat your oven to 425 degrees Fahrenheit. Drain the cooled apples thoroughly using a colander while reserving 1/4 cup of their juice. Mix this reserved juice with lemon juice.
Step 5: Assemble the Pie Filling
Spread the cooled apples into your dough-lined pie plate. Mound them slightly in the center and drizzle with the lemon juice mixture evenly over them.
Step 6: Top Crust Preparation
Roll out your second piece of dough and lay it across the filled pie. Trim this top crust so that there’s about a 1/4-inch overhang around all sides. Tuck this overhang under the bottom crust to seal it well. Crimp edges together for a decorative finish.
Step 7: Ventilate and Brush
Using a sharp paring knife, cut four gashes in the top crust for venting steam during baking. Brush this crust lightly with beaten egg white and sprinkle with remaining tablespoon of sugar.
Step 8: Bake First Phase
Place your assembled pie on a foil-lined baking sheet to catch any drips during baking. Bake until your crust turns golden brown—this should take around 25 minutes.
Step 9: Bake Second Phase
Lower your oven temperature to 375 degrees Fahrenheit. Continue baking until you see juices bubbling through vents and your crust has developed a deep golden color—this will take another 25-30 minutes.
Step 10: Cool Before Serving
After removing from oven, let your Blue Ribbon Apple Pie cool on a wire rack for about two hours until filling sets properly. Serve slightly warm or at room temperature for best results.
How to Serve Blue Ribbon Apple Pie
Serving your Blue Ribbon Apple Pie can elevate the experience for everyone at the table. Whether you prefer it warm or cold, there are various ways to enhance its deliciousness.
Classic with Vanilla Ice Cream
- A scoop of creamy vanilla ice cream adds a delightful contrast to the warm pie, melting slightly into the filling.
Drizzled with Caramel Sauce
- Pouring warm caramel sauce over each slice provides a sweet and rich flavor that pairs perfectly with tart apples.
Topped with Whipped Cream
- Light and airy whipped cream can add a fluffy texture, making each bite feel indulgent and satisfying.
Accompanied by Fresh Fruit Salad
- A fresh fruit salad on the side can balance the sweetness of the pie with a refreshing crunch and natural flavors.
Served with a Slice of Sharp Cheddar
- The sharpness of cheddar cheese complements the sweetness of the pie, creating a unique flavor combination that many enjoy.
Paired with Hot Tea or Coffee
- Enjoying your pie with a cup of hot tea or coffee enhances its comforting qualities and makes for a cozy dessert experience.
How to Perfect Blue Ribbon Apple Pie
Perfecting your Blue Ribbon Apple Pie is all about attention to detail. Here are some tips to ensure your pie turns out fabulous every time.
-
Use Fresh Ingredients: Choose firm apples for better texture and flavor. Mixing tart and sweet varieties like Granny Smith and Honeycrisp creates depth.
-
Avoid Overcooking Apples: Cooking apples just until tender prevents them from becoming mushy during baking, ensuring they hold their shape.
-
Let It Cool: Allowing the pie to cool completely helps the filling set properly, making it easier to slice without spilling.
-
Vent Properly: Cut gashes in the top crust for steam release. This prevents sogginess and helps achieve a flaky crust.
Best Side Dishes for Blue Ribbon Apple Pie
Pairing side dishes with your Blue Ribbon Apple Pie can create a well-rounded meal. Here are some great options:
- Vanilla Ice Cream: A classic pairing that adds creaminess to every slice.
- Caramel Sauce: Elevates the sweetness and adds richness when drizzled on top.
- Whipped Cream: Lightens up each bite while enhancing flavor.
- Fresh Fruit Salad: Offers a refreshing contrast to the sweet pie.
- Sharp Cheddar Cheese: Complements the flavors in an unexpected way.
- Coffee or Tea: Warm beverages make for a comforting finish to your meal.
- Nutty Granola: Adds crunch if served alongside or sprinkled on top.
- Pecan Crumble Topping: Provides extra texture and nutty flavor when served as an additional topping option.
Common Mistakes to Avoid
When making Blue Ribbon Apple Pie, avoiding common mistakes can elevate your baking game. Here are some pitfalls to watch out for:
- Overcooking the Apples: Cooking apples too long can make them mushy. Aim for tender but firm apples by cooking only until slightly softened.
- Skipping the Cooling Step: Letting the cooked apples cool is crucial. Skipping this step can lead to a soggy crust as the juices continue to release.
- Not Sealing the Pie Properly: Failing to tuck and crimp the edges can cause filling to leak out during baking. Ensure a tight seal for a perfect pie.
- Ignoring Ventilation: Cutting slits in the top crust allows steam to escape. Neglecting this could result in a pie that overflows or has a soggy crust.
- Using Warm Filling: Pouring warm filling into a pie crust can lead to a soggy bottom. Always let your filling cool to room temperature before assembling.
Storage & Reheating Instructions
Refrigerator Storage
- Store leftover Blue Ribbon Apple Pie in an airtight container.
- It will last for up to 3-4 days in the refrigerator.
Freezing Blue Ribbon Apple Pie
- Wrap the pie tightly in plastic wrap and then aluminum foil.
- Frozen pies can last up to 2-3 months in the freezer.
Reheating Blue Ribbon Apple Pie
- Oven: Preheat your oven to 350°F (175°C). Place the pie on a baking sheet and heat for about 15-20 minutes until warmed through.
- Microwave: Slice individual pieces and microwave for about 30 seconds, checking every 10 seconds to avoid overheating.
- Stovetop: Heat slices in a non-stick skillet over medium-low heat for about 5 minutes, flipping once.
Frequently Asked Questions
If you have questions about making Blue Ribbon Apple Pie, we’ve got answers!
What apples are best for Blue Ribbon Apple Pie?
Granny Smith and Honeycrisp apples are ideal due to their balance of tartness and sweetness, ensuring delicious flavor.
Can I use store-bought pie dough?
Yes, using store-bought dough is convenient! Just ensure it’s thawed and ready according to package instructions before use.
How do I know when my pie is done?
Look for a golden-brown crust and bubbling juices. The pie should be baked at least 50-60 minutes total.
Can I customize the filling?
Absolutely! Feel free to mix in other fruits like pears or add spices like nutmeg for extra flavor.
Why is my pie crust tough?
A tough crust usually results from overworking the dough. Mix just until combined and handle it gently.
Final Thoughts
Blue Ribbon Apple Pie is not just a dessert; it’s a comforting treat that brings joy with every bite. You can customize it by adding different fruits or spices, making it versatile for any occasion. Don’t hesitate—try this recipe today and create sweet memories!
Blue Ribbon Apple Pie

Indulge in the warmth and nostalgia of Blue Ribbon Apple Pie, a classic dessert that delights with its perfect blend of tart Granny Smith and sweet Honeycrisp apples. This easy-to-make pie features a flaky, buttery crust that encases tender apples, making it an ideal treat for family gatherings, holidays, or cozy weeknight dinners. Serve it warm with a scoop of vanilla ice cream or enjoy it at room temperature for a comforting dessert experience that everyone will love. With straightforward steps and fresh ingredients, you’ll create a pie that’s not only delicious but also visually stunning, sure to impress your guests.
- Prep Time: 20 minutes
- Cook Time: 60 minutes
- Total Time: 1 hour 20 minutes
- Yield: Serves about 8 slices 1x
- Category: Dessert
- Method: Baking
- Cuisine: American
Ingredients
- Double-crust pie dough
- 5 Granny Smith apples (tart)
- 5 Honeycrisp apples (sweet)
- 1/2 cup granulated sugar
- 1/4 cup light brown sugar
- Fresh lemon juice and zest
- Ground cinnamon
- Egg white
Instructions
- Roll out half of the pie dough into a 9-inch pie plate and refrigerate.
- In a large pot, cook sliced apples with sugars, lemon zest, salt, and cinnamon over medium heat until tender (10-12 minutes).
- Allow apples to cool on a baking sheet for 30 minutes.
- Preheat oven to 425°F.
- Drain cooled apples; reserve 1/4 cup juice mixed with lemon juice.
- Fill the crust with cooled apples and drizzle with lemon juice mixture.
- Top with second rolled-out dough, crimp edges to seal, and cut vents for steam.
- Bake at 425°F for 25 minutes, then lower to 375°F for an additional 25-30 minutes until golden brown.
- Cool on wire rack for two hours before serving.
Nutrition
- Serving Size: 1 slice (100g)
- Calories: 245
- Sugar: 18g
- Sodium: 135mg
- Fat: 10g
- Saturated Fat: 5g
- Unsaturated Fat: 4g
- Trans Fat: 0g
- Carbohydrates: 37g
- Fiber: 3g
- Protein: 2g
- Cholesterol: 25mg