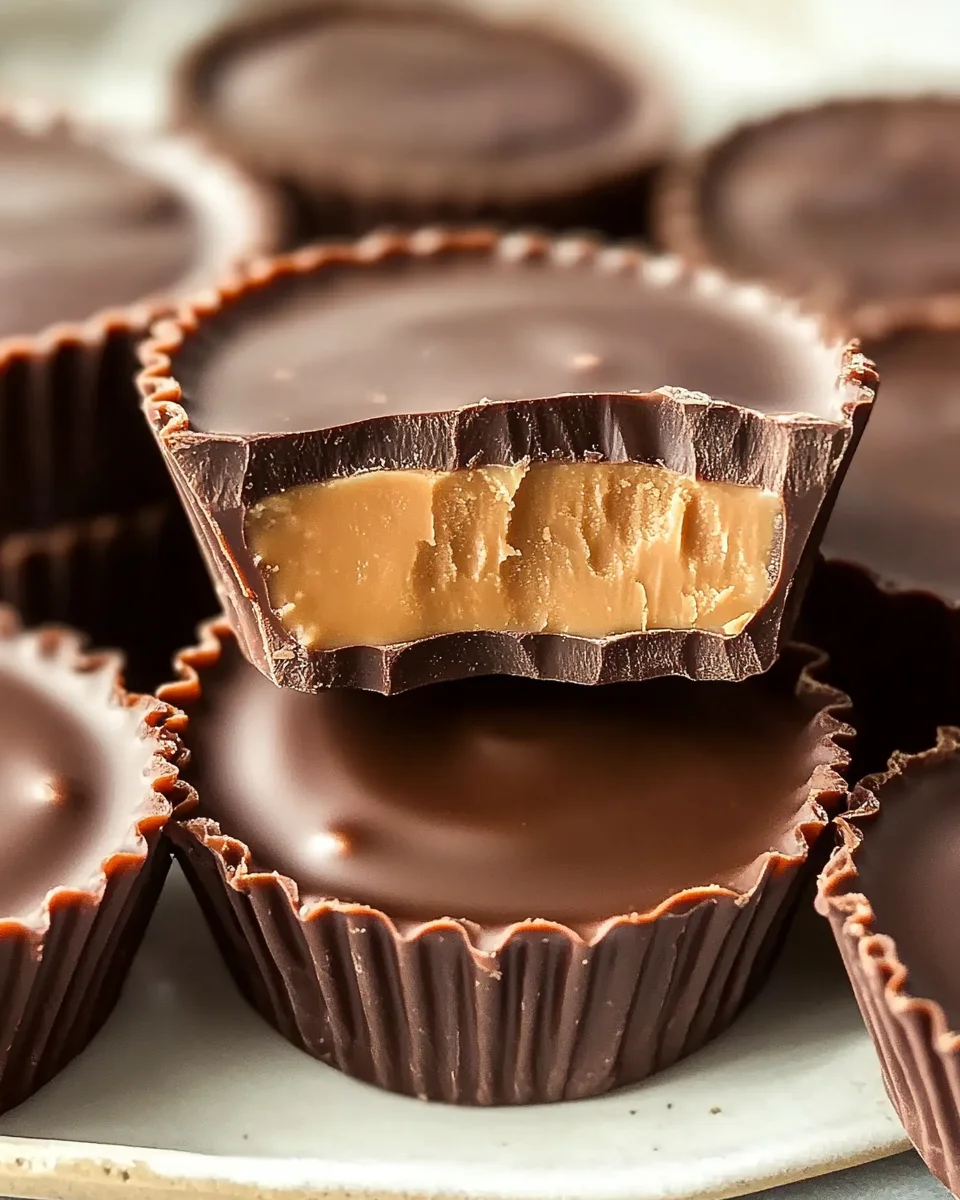
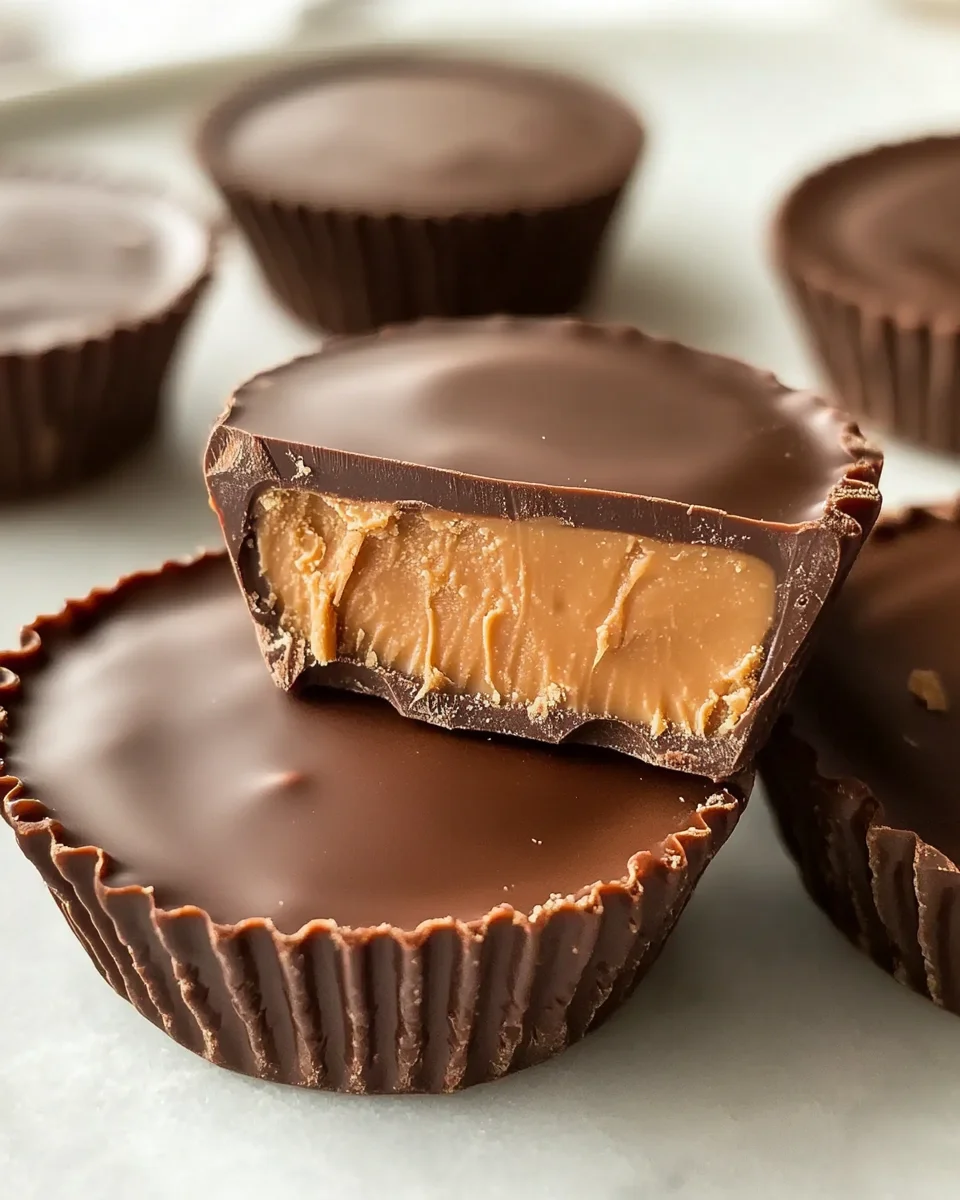
Classic Homemade Reese’s
Classic Homemade Reese’s are the perfect treat for any occasion. With a creamy peanut butter filling coated in rich milk chocolate, these homemade candies are not only easy to make but also incredibly delicious. Whether you’re celebrating a birthday, hosting a movie night, or simply craving something sweet, this recipe will satisfy your taste buds. The combination of textures and flavors makes these treats stand out, ensuring they’ll be a hit with family and friends.
Why You’ll Love This Recipe
- Quick and Easy: This recipe can be whipped up in just 35 minutes, making it perfect for last-minute cravings.
- Irresistible Flavor: The blend of creamy peanut butter and smooth chocolate creates a flavor that is hard to resist.
- Versatile Treat: Perfect for parties, holidays, or just because! These candies suit any occasion.
- Customizable Options: Feel free to add toppings or use dark chocolate for a different twist on the classic taste.
- Kid-Friendly Fun: Involve the little ones in making these treats; they’ll love rolling the peanut butter mixture into balls!
Tools and Preparation
Before you start making Classic Homemade Reese’s, gather your tools and equipment. Having everything ready will make the process smoother and more enjoyable.
Essential Tools and Equipment
- Mixing bowl
- Electric mixer or whisk
- Measuring cups
- Parchment paper
- Microwave-safe bowl
- Spoon
Importance of Each Tool
- Mixing bowl: A spacious bowl allows you to mix ingredients thoroughly without spilling.
- Electric mixer: This tool saves time and ensures a smooth peanut butter mixture without lumps.
- Parchment paper: Prevents sticking and makes cleanup easy when placing your finished candies.
Ingredients
For the Peanut Butter Filling
- 1 cup creamy peanut butter
- 1/4 cup unsalted butter, softened
- 1 teaspoon vanilla extract
- 2 cups powdered sugar
For the Chocolate Coating
- 2 cups milk chocolate chips
- 1 tablespoon coconut oil (optional)
How to Make Classic Homemade Reese’s
Step 1: Prepare the Peanut Butter Mixture
- In a mixing bowl, combine creamy peanut butter, softened butter, and vanilla extract. Mix until smooth.
- Gradually add powdered sugar, continuing to mix until the mixture becomes firm enough to handle.
Step 2: Shape the Filling
- Roll the mixture into 1-inch balls or press it into mini muffin liners for an even shape.
- Place the formed balls onto a plate or tray lined with parchment paper and chill them in the refrigerator until firm.
Step 3: Melt the Chocolate
- In a microwave-safe bowl, combine milk chocolate chips with coconut oil.
- Heat in short intervals, stirring frequently until completely melted and smooth.
Step 4: Coat with Chocolate
- Remove chilled peanut butter balls from the fridge.
- Dip each ball into melted chocolate using a fork, allowing excess chocolate to drip off before placing them back on parchment paper.
Step 5: Set the Candies
- Refrigerate dipped candies for about 20–30 minutes or until the chocolate has fully set.
Step 6: Serve and Enjoy!
Once set, serve your Classic Homemade Reese’s immediately or store them in an airtight container in the fridge for later enjoyment.
How to Serve Classic Homemade Reese’s
Classic Homemade Reese’s are a delightful treat that can be enjoyed in various ways. Whether you’re hosting a party or simply indulging yourself, these candies can be served in many creative ways.
For a Sweet Snack
- On a Dessert Platter: Arrange the candies on a colorful dessert platter alongside fruits like strawberries and bananas for a vibrant display.
- Candy Jars: Fill glass jars with the candies for a visually appealing centerpiece at parties.
With Coffee or Tea
- Coffee Pairing: Enjoy these candies with a rich cup of coffee. The flavors of chocolate and peanut butter complement the bitterness of coffee beautifully.
- Tea Time Treat: Serve alongside herbal tea for a cozy afternoon snack.
As Party Favors
- Gift Bags: Package individual candies in small gift bags for guests to take home after your gathering.
- Themed Occasions: Customize the packaging for birthdays or holidays to make them an even more special treat.
Ice Cream Topping
- Chopped Topping: Chop the candies and sprinkle them over vanilla ice cream for an added crunch and flavor boost.
How to Perfect Classic Homemade Reese’s
To achieve the best results when making Classic Homemade Reese’s, keep these tips in mind.
- Use Room Temperature Ingredients: Using softened butter helps create a smooth mixture that blends well with peanut butter.
- Chill Between Steps: Chilling the peanut butter balls before dipping them in chocolate ensures they hold their shape better.
- Melt Chocolate Carefully: Microwave the chocolate chips in short intervals, stirring often, to prevent burning.
- Experiment with Flavors: Consider adding a pinch of sea salt on top of the chocolate for an extra flavor kick.
Best Side Dishes for Classic Homemade Reese’s
While Classic Homemade Reese’s are delightful on their own, pairing them with complementary side dishes can enhance your dessert experience. Here are some great options:
- Fresh Fruit Salad: A mix of seasonal fruits adds freshness and balances out the richness of the candies.
- Vanilla Ice Cream: The creamy texture of vanilla ice cream pairs perfectly with the chocolate and peanut butter flavors.
- Chocolate Dipped Pretzels: These provide a salty crunch that contrasts nicely with the sweetness of the Reese’s.
- Cheese Platter: A variety of cheeses can offer savory bites that balance out your dessert table.
- Nut Mixes: A selection of nuts provides both health benefits and complementary flavors to your candy treat.
- Mini Cupcakes: Small cupcakes with similar flavors (like peanut butter frosting) can create a cohesive dessert theme.
- Caramel Sauce Dip: Serve alongside caramel sauce for an indulgent twist; perfect for drizzling or dipping!
- Coffee or Hot Chocolate Bar: Set up a drink station where guests can create their own hot beverages to enjoy with their candies.
Common Mistakes to Avoid
Making Classic Homemade Reese’s is a joyous experience, but there are common pitfalls to watch out for.
- Overmixing the Filling: This can lead to a tough texture. Mix until just combined for a smooth and creamy filling.
- Skipping the Chilling Step: Not chilling the peanut butter mixture can result in messy dipping. Always chill for at least 30 minutes to firm it up.
- Using Low-Quality Chocolate: Cheap chocolate can ruin the taste. Opt for high-quality chocolate chips for a rich flavor.
- Not Measuring Ingredients Accurately: Imbalances can affect texture and taste. Use precise measurements to ensure perfect results every time.
- Dipping Too Quickly: Rushing the dipping process can create uneven coatings. Take your time to ensure an even layer of chocolate.
Storage & Reheating Instructions
Refrigerator Storage
- Store in an airtight container.
- They will last up to 1 week in the fridge.
Freezing Classic Homemade Reese’s
- Place them in a single layer on a baking sheet until frozen.
- Once solid, transfer them to a freezer bag or container. They can be frozen for up to 3 months.
Reheating Classic Homemade Reese’s
- Oven: Preheat oven to 350°F (175°C). Warm for about 5 minutes or until slightly soft.
- Microwave: Heat on medium power for 10-15 seconds, checking frequently to avoid melting too much.
- Stovetop: Place in a pan over very low heat, stirring gently until warmed through.
Frequently Asked Questions
Here are some common questions about making Classic Homemade Reese’s that might help you.
Can I use crunchy peanut butter instead of creamy?
You can substitute crunchy peanut butter if you prefer added texture. However, it may alter the creaminess of the filling.
How do I make these gluten-free?
The ingredients listed are naturally gluten-free. Just ensure your chocolate chips are certified gluten-free as well.
What if I don’t have coconut oil?
Coconut oil adds shine and helps with melting chocolate smoothly, but it’s optional. You can melt chocolate without it; just be careful not to burn it.
Can I customize the filling?
Absolutely! Feel free to add mix-ins like crushed pretzels or nuts for extra flavor and crunch in your Classic Homemade Reese’s.
Final Thoughts
Classic Homemade Reese’s are not only easy to make but also incredibly satisfying. Their sweet and salty flavor combination makes them perfect for any occasion. Feel free to customize your candies with different chocolates or fillings to match your taste preferences!
Classic Homemade Reese’s

Classic Homemade Reese’s are a delightful combination of creamy peanut butter filling and rich milk chocolate, making them the perfect indulgent treat for any occasion. Whether you’re celebrating a special event or simply satisfying a sweet tooth, these homemade candies are both easy to prepare and utterly delicious. The balance of textures and flavors ensures they will be loved by family and friends alike. With just a few simple ingredients, you can whip up these nostalgic treats in no time!
- Prep Time: 15 minutes
- Cook Time: 20 minutes
- Total Time: 35 minutes
- Yield: Approximately 20 candies 1x
- Category: Dessert
- Method: No-bake
- Cuisine: American
Ingredients
- 1 cup creamy peanut butter
- 1/4 cup unsalted butter, softened
- 1 teaspoon vanilla extract
- 2 cups powdered sugar
- 2 cups milk chocolate chips
- 1 tablespoon coconut oil (optional)
Instructions
- In a mixing bowl, combine peanut butter, softened butter, and vanilla extract until smooth.
- Gradually add powdered sugar and mix until the mixture is firm enough to handle.
- Roll the mixture into 1-inch balls or press into mini muffin liners.
- Chill the formed balls in the refrigerator until firm.
- Melt milk chocolate chips with coconut oil in a microwave-safe bowl in short intervals, stirring frequently until smooth.
- Dip each chilled ball into melted chocolate, allowing excess to drip off before placing on parchment paper.
- Refrigerate until set.
Nutrition
- Serving Size: 1 candy
- Calories: 150
- Sugar: 12g
- Sodium: 75mg
- Fat: 9g
- Saturated Fat: 3g
- Unsaturated Fat: 4g
- Trans Fat: 0g
- Carbohydrates: 14g
- Fiber: 1g
- Protein: 3g
- Cholesterol: 5mg