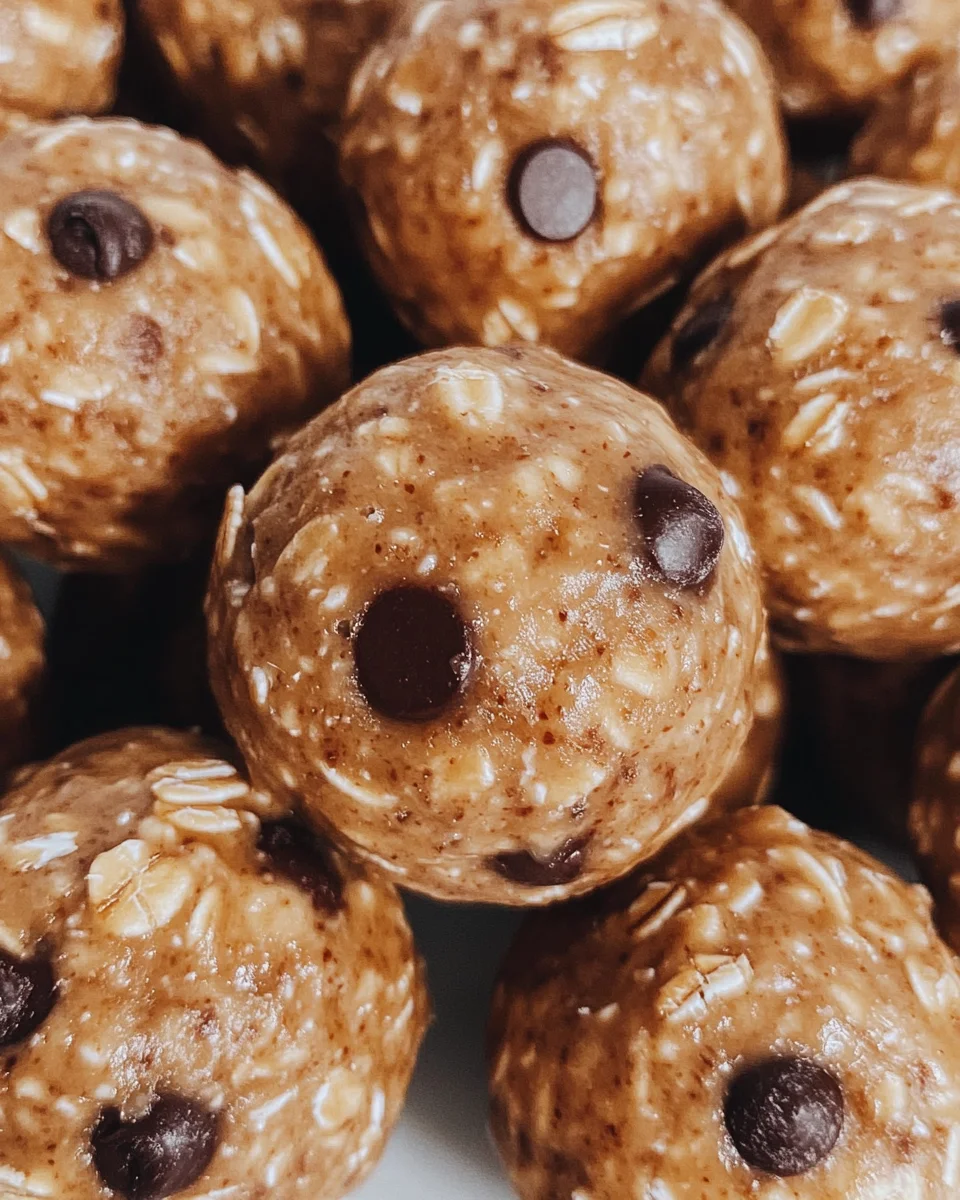
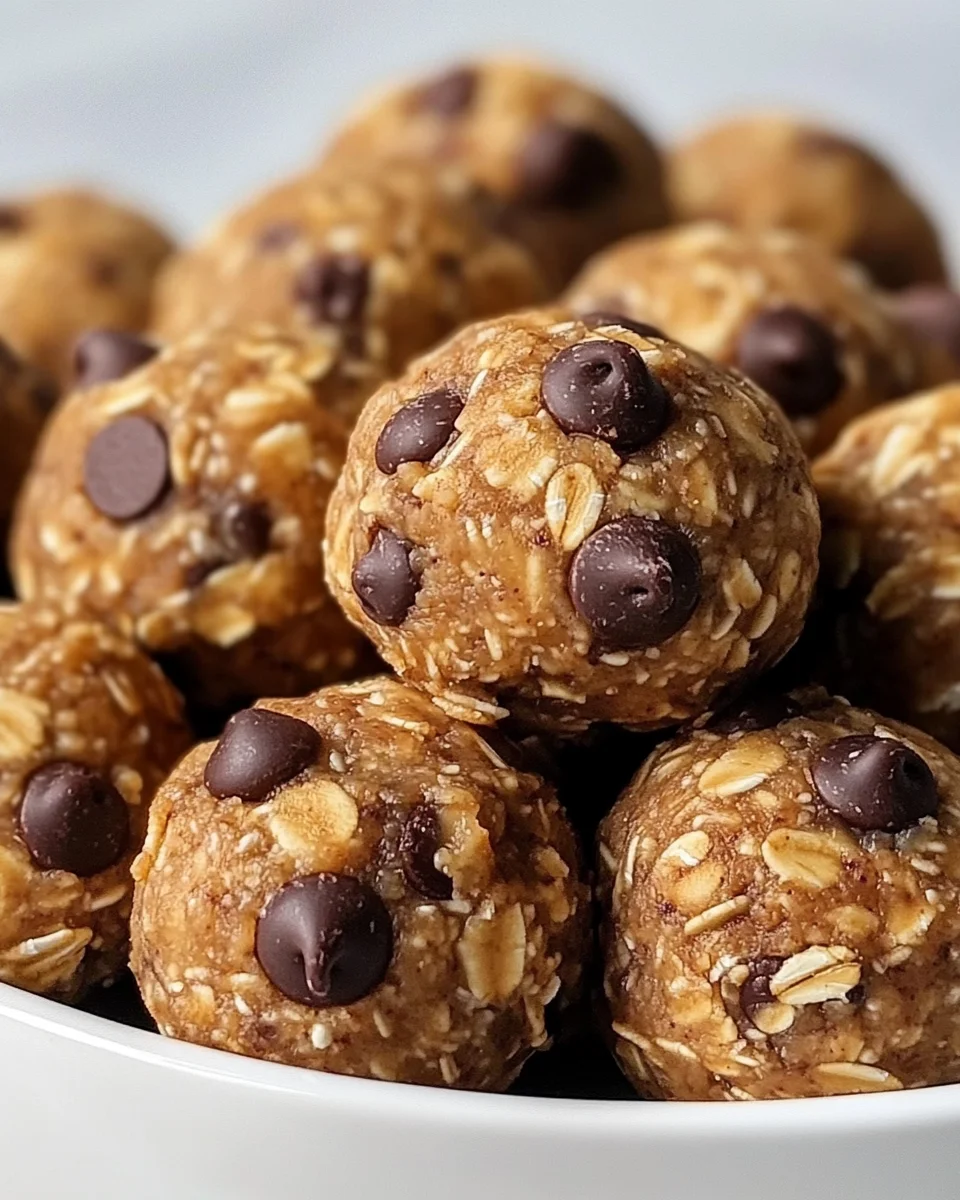
No Bake Protein Balls
The No Bake Protein Balls recipe is the perfect solution for a quick, nutritious snack. These delightful energy bites are packed with protein and fiber, making them an ideal choice for pre- or post-workout fuel, a midday pick-me-up, or a sweet treat without the guilt. With just six simple ingredients, this no-bake recipe is not only easy to follow but also versatile enough to adapt to your taste preferences. Whether you’re looking for a healthy snack option for kids or something to satisfy your own cravings, these protein balls shine in every way!
Why You’ll Love This Recipe
- Quick and Easy: This recipe comes together in just 10 minutes, making it perfect for busy days when you need a healthy snack in a hurry.
- Nutritious Ingredients: Packed with protein powder and oats, these energy balls provide essential nutrients while satisfying your sweet tooth.
- Customizable Flavors: Feel free to add nuts, seeds, or even dried fruit to make them uniquely yours!
- Perfect for Meal Prep: Make a batch ahead of time and store them in the fridge or freezer for easy snacking throughout the week.
- Kid-Friendly: These No Bake Protein Balls are a fun treat that kids will love, helping them fuel up for their activities.
Tools and Preparation
Before you start making your No Bake Protein Balls, gather all the necessary tools. Having everything on hand will streamline the process and make it more enjoyable.
Essential Tools and Equipment
- Mixing bowl
- Rubber spatula
- Mini cookie scoop or spoon
- Wax paper
- Cookie sheet
- Ziploc bag
Importance of Each Tool
- Mixing bowl: A sturdy bowl is essential for combining all your ingredients thoroughly.
- Rubber spatula: This tool helps you mix without damaging the bowl and ensures you get every bit of batter out.
- Mini cookie scoop: Using this makes portioning out the energy balls quick and consistent.
Ingredients
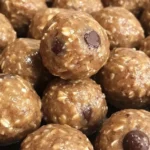
The best easy no bake protein balls recipe made with just 6 ingredients! These oatmeal energy bites are made with protein powder for a filling and healthy snack.
For the Energy Balls
- 1 1/2 cups no stir creamy peanut butter
- 1/2 cup honey
- 1 1/3 cups old fashioned oats (rolled oats)
- 1/2 cup vanilla protein powder
- 1/8 teaspoon salt
- 1/2 cup mini chocolate chips
How to Make No Bake Protein Balls
Step 1: Combine Ingredients
Add the no stir creamy peanut butter, honey, rolled oats, vanilla protein powder, salt, and mini chocolate chips into a mixing bowl. Use a rubber spatula to mix everything until well combined.
Step 2: Portion Out the Balls
Using a mini cookie scoop or spoon, drop about one-inch-sized portions of the mixture onto a wax paper-covered cookie sheet.
Step 3: Shape the Energy Balls
Roll each portion into a ball shape using your hands. This step helps ensure that they hold together well after cooling.
Step 4: Chill in the Fridge
Place the cookie sheet with your energy bites into the fridge. Allow them to chill for about one hour or until they have hardened.
Step 5: Store Your Energy Balls
Once hardened, transfer your No Bake Protein Balls into a Ziploc bag. Store them in the refrigerator for up to one week or freeze them for 2-3 months for longer storage.
Step 6: Enjoy!
Be sure to check out my Energy Bites Cookbook based on this recipe plus more than 20 other flavors you’ll love! Enjoy your deliciously nutritious No Bake Protein Balls anytime you need a quick snack!
How to Serve No Bake Protein Balls
No bake protein balls are versatile snacks that can be enjoyed in various ways. Whether you’re looking for a quick energy boost or a delicious treat, these protein-packed bites are perfect for any occasion.
As a Snack on the Go
- Portable Energy: Pack them in a small container for a quick snack before or after workouts.
- Lunchbox Addition: Add a couple to your kids’ lunchboxes for a healthy treat.
With Dips
- Nut Butter Dip: Serve with extra peanut butter or almond butter for added flavor and protein.
- Yogurt Dip: Pair with Greek yogurt mixed with honey for a creamy accompaniment.
In Smoothie Bowls
- Topping Delight: Crumble over smoothie bowls for an added crunch and protein boost.
- Flavor Infusion: Blend into smoothies for a thicker consistency and rich taste.
As Dessert
- Chocolate Drizzle: Drizzle melted dark chocolate on top for an indulgent dessert option.
- Coconut Coating: Roll in shredded coconut for a tropical twist.
How to Perfect No Bake Protein Balls
Creating the ultimate no bake protein balls is simple with these tips. Follow these suggestions to ensure your energy bites are consistently tasty and satisfying.
- Use Fresh Ingredients: Ensure that your oats and nut butter are fresh for optimal flavor and texture.
- Adjust Sweetness: Feel free to modify the amount of honey based on your sweetness preference.
- Experiment with Mix-Ins: Try adding chia seeds, flaxseed, or dried fruits for varied textures and flavors.
- Chill Properly: Allow the balls to chill until firm; this helps maintain their shape when serving.
- Measure Accurately: Use precise measurements especially when adding protein powder to maintain consistency.
- Store Correctly: Keep them in airtight containers to preserve freshness longer.
Best Side Dishes for No Bake Protein Balls
No bake protein balls can be paired with other dishes to create a balanced meal or snack platter. Here are some side dishes that complement these energy bites perfectly.
- Fresh Fruit Salad: A mix of seasonal fruits adds freshness and natural sweetness.
- Vegetable Sticks with Hummus: Crunchy veggies like carrots and celery pair well with creamy hummus.
- Greek Yogurt Parfait: Layer yogurt with granola and berries for a nutritious side that balances the richness of the protein balls.
- Rice Cakes with Nut Butter: Spread nut butter on rice cakes for a crunchy alternative that complements the softness of the protein balls.
- Oatmeal Cups: Baked oatmeal cups are great alongside no bake protein balls for extra fiber and energy.
- Trail Mix: A homemade trail mix of nuts, seeds, and dried fruit offers variety and crunch to your plate.
Common Mistakes to Avoid
Making No Bake Protein Balls can be simple, but it’s easy to make mistakes. Here are some common pitfalls and how to avoid them.
- ingredient measurement: Not measuring ingredients properly can lead to inconsistent results. Use measuring cups and spoons for accuracy.
- using the wrong type of oats: Instant oats may not hold up well in this recipe. Stick with old fashioned rolled oats for the best texture.
- skipping refrigeration: Failing to chill the protein balls can result in a mushy texture. Always refrigerate for at least an hour to firm them up.
- not mixing thoroughly: Incomplete mixing can lead to uneven flavor and texture. Ensure all ingredients are well combined before forming balls.
- overloading on mix-ins: Adding too many extras like nuts or seeds can change the consistency. Stick to the recommended amounts for ideal results.
Storage & Reheating Instructions
Refrigerator Storage
- Store No Bake Protein Balls in an airtight container.
- They will last about one week in the fridge.
Freezing No Bake Protein Balls
- Place protein balls in a single layer on a baking sheet before freezing.
- Once frozen, transfer them to a ziplock bag or airtight container for up to 2-3 months.
Reheating No Bake Protein Balls
- Oven: Preheat oven to 350°F (175°C) and warm for about 5 minutes.
- Microwave: Heat for 10-15 seconds for a quick warmth boost.
- Stovetop: Lightly warm in a pan on low heat, turning frequently.
Frequently Asked Questions
Here are some common questions about making No Bake Protein Balls.
Can I use any protein powder?
Yes, you can use any flavor of protein powder you prefer, but vanilla complements the other ingredients best.
How do I customize my No Bake Protein Balls?
You can add various mix-ins such as nuts, seeds, or dried fruit according to your taste preferences.
Are No Bake Protein Balls gluten-free?
If you use certified gluten-free oats and check other ingredients, they can be gluten-free.
How long does it take to make No Bake Protein Balls?
This recipe takes only about 10 minutes of prep time, plus some chilling time in the fridge.
Can I use maple syrup instead of honey?
Absolutely! Maple syrup is a great vegan alternative that works well in this recipe.
Final Thoughts
No Bake Protein Balls are not only easy to make but also versatile. You can customize them with different flavors and mix-ins according to your taste. Try this delightful snack today!
No Bake Protein Balls
No Bake Protein Balls are your go-to solution for a quick, nutritious snack that satisfies cravings without the guilt. Perfectly suited for pre- or post-workout energy, these delightful bites combine protein and fiber to keep you feeling full and energized. With just six simple ingredients, this no-bake recipe is not only easy to make but also highly customizable—add your favorite nuts, seeds, or dried fruits to suit your taste. Whether you need a healthy snack for the kids or a sweet treat for yourself, these protein-packed energy balls are sure to impress!
- Prep Time: 10 minutes
- Cook Time: None
- Total Time: 0 hours
- Yield: Approximately 16 servings 1x
- Category: Snack
- Method: No Bake
- Cuisine: American
Ingredients
- 1 1/2 cups no stir creamy peanut butter
- 1/2 cup honey
- 1 1/3 cups old fashioned oats (rolled oats)
- 1/2 cup vanilla protein powder
- 1/8 teaspoon salt
- 1/2 cup mini chocolate chips
Instructions
- In a mixing bowl, combine peanut butter, honey, rolled oats, protein powder, salt, and mini chocolate chips. Stir until well mixed.
- Use a mini cookie scoop or spoon to portion out about one-inch-sized balls onto a wax paper-covered cookie sheet.
- Roll each portion into a ball using your hands to ensure they hold their shape.
- Refrigerate for approximately one hour until firm.
- Store in an airtight container in the fridge for up to one week or freeze for 2-3 months.
Nutrition
- Serving Size: 1 serving
- Calories: 104
- Sugar: 6g
- Sodium: 55mg
- Fat: 5g
- Saturated Fat: 1g
- Unsaturated Fat: 4g
- Trans Fat: 0g
- Carbohydrates: 12g
- Fiber: 1g
- Protein: 4g
- Cholesterol: 0mg