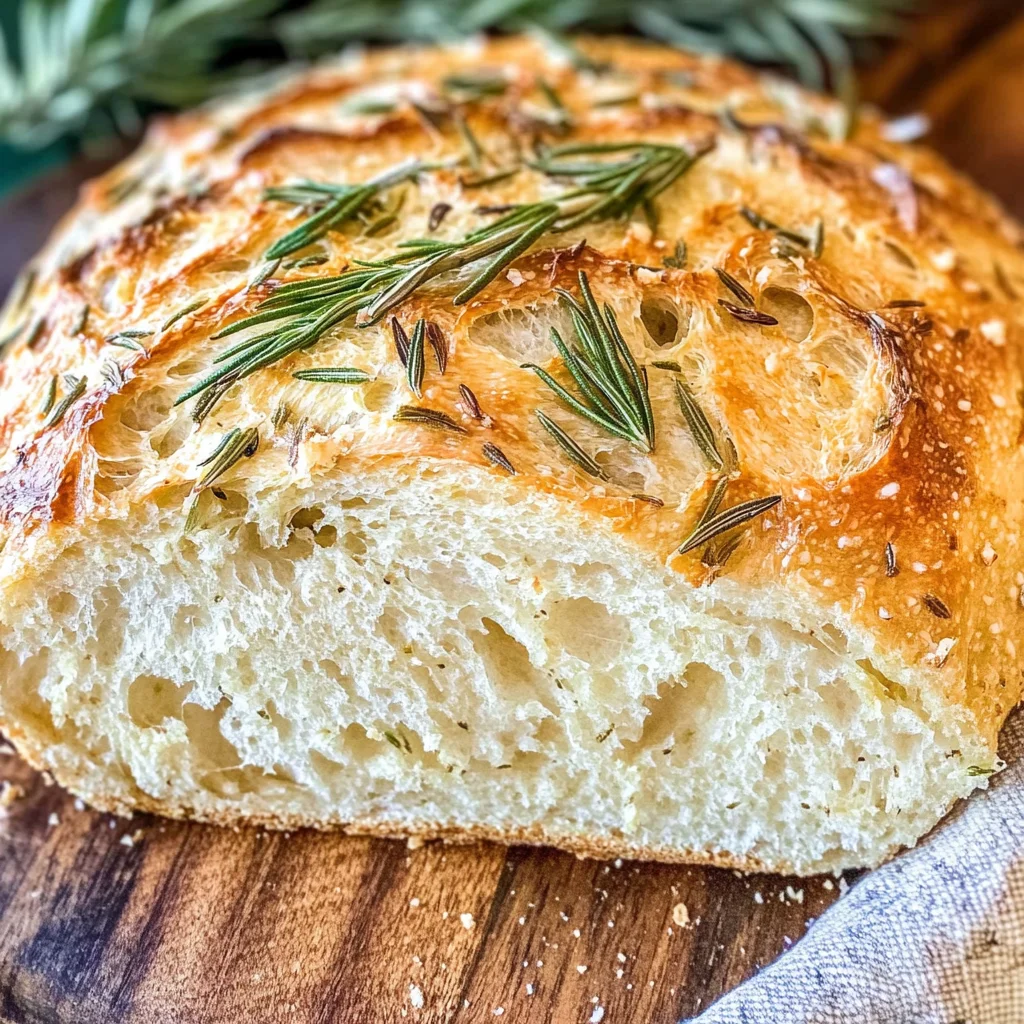
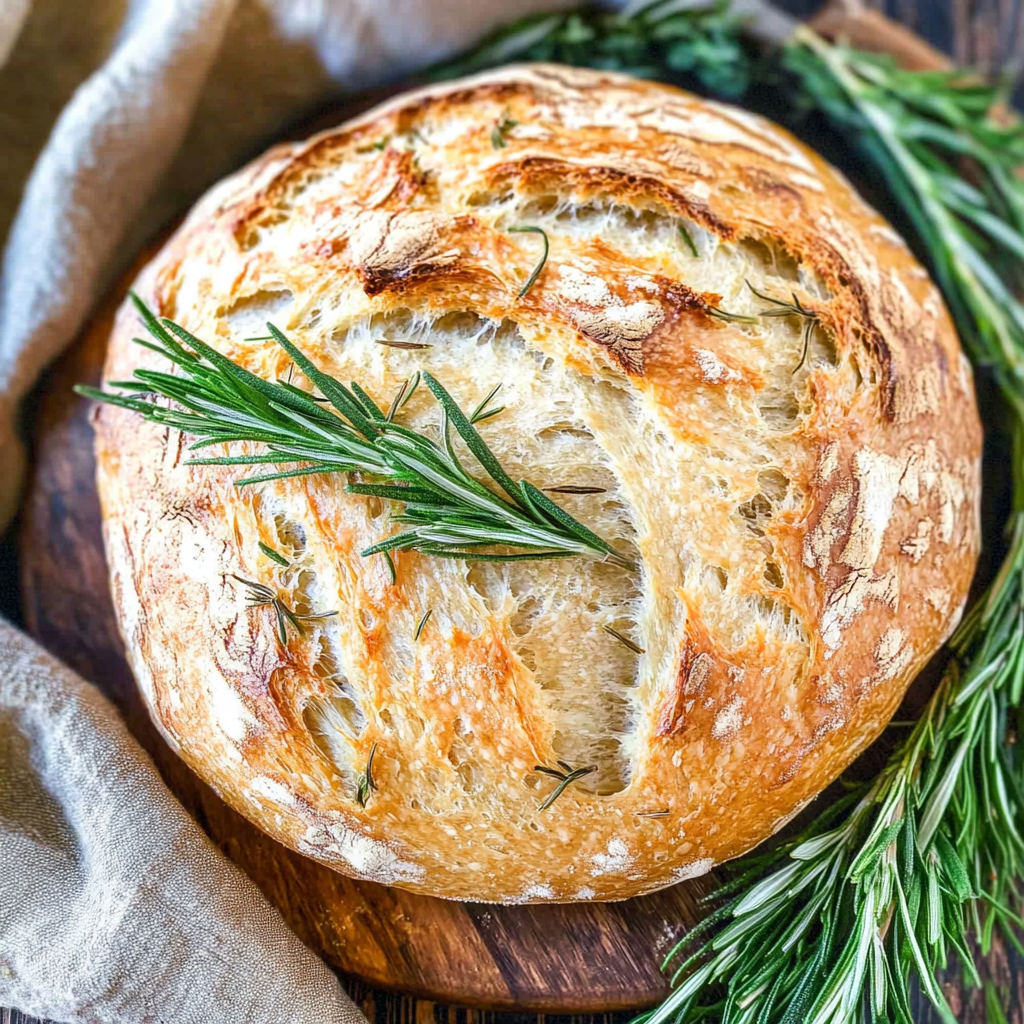
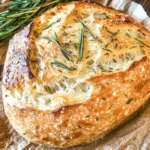
Rustic No-Knead Rosemary Garlic Bread
If you’re looking for a simple yet delightful bread to elevate your meals, you’ve come to the right place! This Rustic No-Knead Rosemary Garlic Bread is one of my absolute favorites. It’s the kind of bread that fills your kitchen with irresistible aromas and makes even the busiest weeknight dinners feel special. You won’t believe how easy it is to whip up this artisan-style loaf without any kneading—just mix, let it rise, and bake!
What I love most about this recipe is its flexibility. Whether you’re hosting a family gathering or simply enjoying a cozy night in, this bread perfectly complements any occasion. It pairs beautifully with soups, salads, or even as a stand-alone snack with some olive oil for dipping. Trust me; once you try it, you’ll want to bake this bread time and time again.
Why You’ll Love This Recipe
- No Kneading Required: This recipe takes away the labor of kneading, making it perfect for busy bakers or those just getting started.
- Fragrant Flavors: Infused with rosemary and garlic, each bite bursts with flavor that will keep everyone coming back for more.
- Perfectly Simple: With just a handful of ingredients, this Rustic No-Knead Rosemary Garlic Bread is as uncomplicated as it gets.
- Great for Meal Prep: Bake ahead of time and enjoy it throughout the week—perfect for sandwiches or toasted slices!
- Family-Friendly: Kids and adults alike will love this bread; it’s a fantastic way to get everyone involved in the kitchen!
Ingredients You’ll Need
For this Rustic No-Knead Rosemary Garlic Bread, you’ll only need a few simple and wholesome ingredients. Each one plays an important role in creating that deliciously rustic loaf we all crave.
For the Dough
- All-purpose flour
- Warm water
- Instant yeast
- Salt
- Fresh rosemary, chopped
- Garlic cloves, minced
Variations
One of the best things about this Rustic No-Knead Rosemary Garlic Bread is how adaptable it is! Feel free to get creative with these fun variations:
- Add Cheese: Incorporate shredded cheese like mozzarella or cheddar into the dough for an extra layer of flavor.
- Experiment with Herbs: Try other herbs like thyme or oregano if rosemary isn’t your favorite.
- Make it Spicy: Add red pepper flakes to give your bread a bit of heat.
- Change Up the Shape: Instead of a round loaf, shape it into rolls for individual servings—great for gatherings!
How to Make Rustic No-Knead Rosemary Garlic Bread
Step 1: Mix Your Ingredients
In a large bowl, combine the all-purpose flour, instant yeast, and salt. Stir them together until they are well blended. Then, add in the warm water along with the chopped rosemary and minced garlic. This step is crucial because mixing these ingredients creates the base structure of your bread.
Step 2: Let It Rise
Cover your bowl with plastic wrap or a damp cloth and let it sit at room temperature for about 12-18 hours. This long resting period allows the flavors to develop beautifully while creating those lovely air bubbles that make your bread light and airy. Don’t rush this step; patience is key here!
Step 3: Shape Your Dough
After rising, your dough should be bubbly and sticky. Dust your work surface with flour and gently turn out the dough onto it. With floured hands, fold it over on itself a couple of times before shaping it into a ball. The gentle handling helps maintain those precious air pockets.
Step 4: Second Rise
Place your shaped dough onto parchment paper in a bowl or on a baking sheet. Cover it again and let it rise for another hour. This second rise gives your bread more volume and enhances its texture.
Step 5: Preheat Your Oven
While your dough rises for the second time, preheat your oven to 450°F (232°C). You can also place a Dutch oven inside to heat up—this will create steam during baking, resulting in an incredible crust.
Step 6: Bake Your Bread
Carefully remove the hot Dutch oven from your oven (don’t forget those oven mitts!). Lift the parchment paper with the dough and place it inside. Cover with the lid and bake for 30 minutes. Then remove the lid and bake for an additional 15-20 minutes until golden brown. The aroma filling your house at this point will be heavenly!
Step 7: Cool Before Slicing
Once baked, transfer your loaf onto a wire rack to cool slightly before slicing. Letting it cool helps set the crumb structure so you can achieve those beautiful slices later on.
And there you have it! A stunning Rustic No-Knead Rosemary Garlic Bread that’s sure to impress anyone lucky enough to have a piece! Enjoy every bite!
Pro Tips for Making Rustic No-Knead Rosemary Garlic Bread
Baking bread can be a rewarding experience, and with these pro tips, you’ll elevate your no-knead game to a whole new level!
- Use Fresh Ingredients: Fresh rosemary and garlic make all the difference in flavor. Dried herbs just can’t match the aromatic punch of fresh ones, ensuring your bread is bursting with savory goodness.
- Let It Rest: Allowing the dough to rest for at least 12 hours helps develop complex flavors and improves texture. This long fermentation enhances the taste and makes the bread easier to digest.
- Preheat Your Dutch Oven: Heating your baking vessel before adding the dough creates steam during baking, resulting in a perfect crust. The steam helps achieve that professional artisan look!
- Don’t Skip the Flour Dusting: Lightly dusting your work surface and the top of the dough with flour prevents sticking. It also gives your loaf a rustic appearance when baked, adding to its charm.
- Experiment with Flavors: Feel free to add other herbs or spices to customize your bread. Variations like thyme or even crushed red pepper can give it a unique twist that suits your palate.
How to Serve Rustic No-Knead Rosemary Garlic Bread
This delightful bread not only tastes great but looks beautiful on any table. Here are some creative ways to present it!
Garnishes
- Olive Oil Dip: A simple blend of high-quality olive oil with a sprinkle of sea salt and cracked black pepper makes for an elegant dipping option.
- Fresh Herb Sprigs: Adding sprigs of rosemary or thyme as a garnish can enhance both presentation and aroma, inviting everyone to dig in.
Side Dishes
- Mixed Green Salad: A light salad with seasonal greens, cherry tomatoes, and a tangy vinaigrette complements the richness of the bread perfectly.
- Roasted Vegetables: Serve alongside roasted seasonal veggies like carrots, zucchini, and bell peppers for a colorful and nutritious plate.
- Creamy Soup: Pair this bread with a comforting pumpkin or tomato soup. The creamy texture contrasts beautifully with the crusty bread.
- Cheese Platter: Create a cheese board featuring mild cheeses such as mozzarella or goat cheese alongside fruits like grapes or figs for a delightful appetizer spread.
With these serving suggestions, you’ll impress your family and friends while enjoying this delicious Rustic No-Knead Rosemary Garlic Bread!
Make Ahead and Storage
This Rustic No-Knead Rosemary Garlic Bread is perfect for meal prep! It’s easy to make in advance, allowing you to enjoy freshly baked bread whenever you desire without much fuss.
Storing Leftovers
- Allow the bread to cool completely before storing.
- Wrap it in a clean kitchen towel or place it in an airtight container to maintain freshness.
- Store at room temperature for up to 3 days.
Freezing
- Slice the bread before freezing for easier enjoyment later.
- Wrap each slice tightly in plastic wrap, then place in a freezer-safe bag.
- Freeze for up to 3 months; label the bag with the date.
Reheating
- For best results, reheat directly from frozen:
- Preheat your oven to 350°F (175°C).
- Place the slices on a baking sheet and cover with foil.
- Heat for about 10-15 minutes until warmed through.
FAQs
Here are some common questions about this delightful recipe!
How do I make Rustic No-Knead Rosemary Garlic Bread?
To make this delicious bread, simply mix flour, water, salt, rosemary, and minced garlic. Let it rest overnight, then bake in a preheated oven until golden brown.
Can I use fresh rosemary in Rustic No-Knead Rosemary Garlic Bread?
Absolutely! Fresh rosemary adds vibrant flavor. Just chop it finely before adding it to your dough.
What should I serve with Rustic No-Knead Rosemary Garlic Bread?
This bread pairs wonderfully with soups, salads, or as a side for any main dish. It’s also great for sandwiches!
How long does Rustic No-Knead Rosemary Garlic Bread last?
When stored properly at room temperature, it stays fresh for about 3 days. If frozen, it can last up to 3 months.
Can I modify the recipe?
Definitely! Feel free to experiment by adding other herbs or spices that you enjoy. This recipe is versatile and can be tailored to your taste.
Final Thoughts
I hope you find joy in making this Rustic No-Knead Rosemary Garlic Bread as much as I do! It’s such a special addition to any meal and brings warmth into your kitchen. Enjoy the process and the delightful aroma that fills your home while baking. I’m excited for you to try this recipe—happy baking!
Rustic No-Knead Rosemary Garlic Bread
If you’re searching for an effortless yet delectable addition to your meals, look no further than this Rustic No-Knead Rosemary Garlic Bread. This easy-to-make artisan-style loaf fills your kitchen with inviting aromas, making even the busiest weeknight dinners feel exceptional. With minimal effort—just mix, rise, and bake—you’ll create a crusty, flavorful bread that pairs beautifully with soups, salads, or can be enjoyed on its own with a drizzle of olive oil.
- Prep Time: 15 minutes
- Cook Time: 45 minutes
- Total Time: 1 hour
- Yield: Approximately 12 servings
- Category: Bread
- Method: Baking
- Cuisine: American
Ingredients
- All-purpose flour
- Warm water
- Instant yeast
- Salt
- Fresh rosemary, chopped
- Garlic cloves, minced
Instructions
- In a large bowl, combine all-purpose flour, instant yeast, and salt.
- Stir in warm water, chopped rosemary, and minced garlic until mixed.
- Cover and let rise at room temperature for 12-18 hours.
- Dust your work surface with flour and turn out the dough; shape it gently into a ball.
- Let it rise again for 1 hour on parchment paper.
- Preheat your oven to 450°F (232°C) while the dough rises.
- Bake in a preheated Dutch oven for 30 minutes covered, then an additional 15-20 minutes uncovered until golden brown.
- Cool on a wire rack before slicing.
Nutrition
- Serving Size: 1 serving
- Calories: 135
- Sugar: 0g
- Sodium: 290mg
- Fat: 0.5g
- Saturated Fat: 0g
- Unsaturated Fat: 0.5g
- Trans Fat: 0g
- Carbohydrates: 28g
- Fiber: 1g
- Protein: 4g
- Cholesterol: 0mg